
Hello friends! What a day today has been! I went to the local Color Run today. It's a 5K where they spray you with a bunch of colored corn starch as you run. It was a total blast! I came home to an empty house, since my husband had taken all of my kids with him to my son's soccer game, so I immediately got to working on a project that I've been meaning to get around to for quite awhile. I still haven't even had a shower yet. My skin is blue! Do you remember my mudroom entryway? Well, if you go back and look at those pictures, you'll see that there are only two crates for shoes in the bottom cubbies. Here's what I'm talking about.

Well, I made those two crates, and got lazy and have never made the other two! We just shove shoes in those other two cubbies...and you can see them all jumbled up in there. It's not cute.
Today I'm going to show you how to make one of these cute rustic crates....and guess what! It costs under 5 dollars to make! Might even be under 4 ;) I've seen these for sale in places and you can never find something this sturdy for anything less than 30-40 bucks or higher.
First what you need is about two pieces of 1x2 lumber....I bought the 8ft lengths. You would just need one piece if you got a longer piece. You will end up using about 1.5 pieces of the 8 ft lengths. Those are only $1 each.
Then you need a pack and a half of these:

I paid about 2.50 for these. For this crate, I only used one pack. For my other crates, I needed a pack and a half. I suggest grabbing three packs so that you can make two crates.
I also used Minwax Dark Walnut stain

First what you want to do is measure (or figure out ) what the dimensions of your box will be. For me, I measured the height, depth and width of my cubby. If you don't have a cubby this needs to fit in, then decide how tall, deep and wide you want it and write those measurements down. For the front of the cubby, I needed mine to be 11.75 inches wide, so I cut four pieces of the 1x2 that were that length. I wanted it to be 19 inches deep, but I needed to take into consideration the depth of the wood that I'd be joining those first pieces to. Each 1x2 was 1.5 inches deep, so I subtracted 3 inches (the depth of two 1x2s) from the length of my pieces and cut four pieces at 16 inches. If that doesn't make sense, scroll down and see the pictures of how I joined the wood pieces together and you see why I had to shorten those pieces.

Some tips for using the miter saw. Make sure to line up your blade not directly on your mark, but along side of it. You want the little bit of wood that is obliterated by the width of the blade to come out of the part of the wood that you are not using. So make sure you have your wood in such a way that your mark comes up just barely to the edge of one side of the blade.
When I want to cut several pieces the same length, I always use the first piece as a guide. I just draw a line on my new wood, and then cut from that line. I always come over just a hair, though, because you have to take into account for the thickness of the pencil line. So you will want the outside edge of your blade to come down just on the inside of your pencil line. Also, make sure you use the same piece of wood to measure for all of your cuts. Don't assume they are all the same and use the one you just cut for the next measurement. They will start to gradually get larger. You really want these all to be the same length, if you want this thing to be square.

You should have four long pieces and four short pieces....get out your nail gun...or (gulp) a hammer and nails if you don't have a nail gun. hint...you really want a nail gun.

Wear eye protection! ....in my color run garb still...

Nail the top of the long piece to the side of the short piece at the ends. You are going to nail in from the side of the short piece and the nail will go into the long piece down the length of it. Just shoot one nail into it, then lay it on the floor, then flip it over. This will make sure it is strait, once you have it strait, then shoot a couple more nails into it to secure it in place.

Add another short piece to the other end of the long piece. Remember, the end of the long piece butts up to the side of the short piece. This is why we cut the long pieces a little shorter, because we wanted the length of the entire thing to be 19 inches, not just the length of the piece of wood. put it on the floor and flip it over again....then add a few more nails.

repeat the process for the last long piece....and you have a rectangle. It should be square. Check it with a square to make sure.

Now repeat this whole process to build a second rectangle.

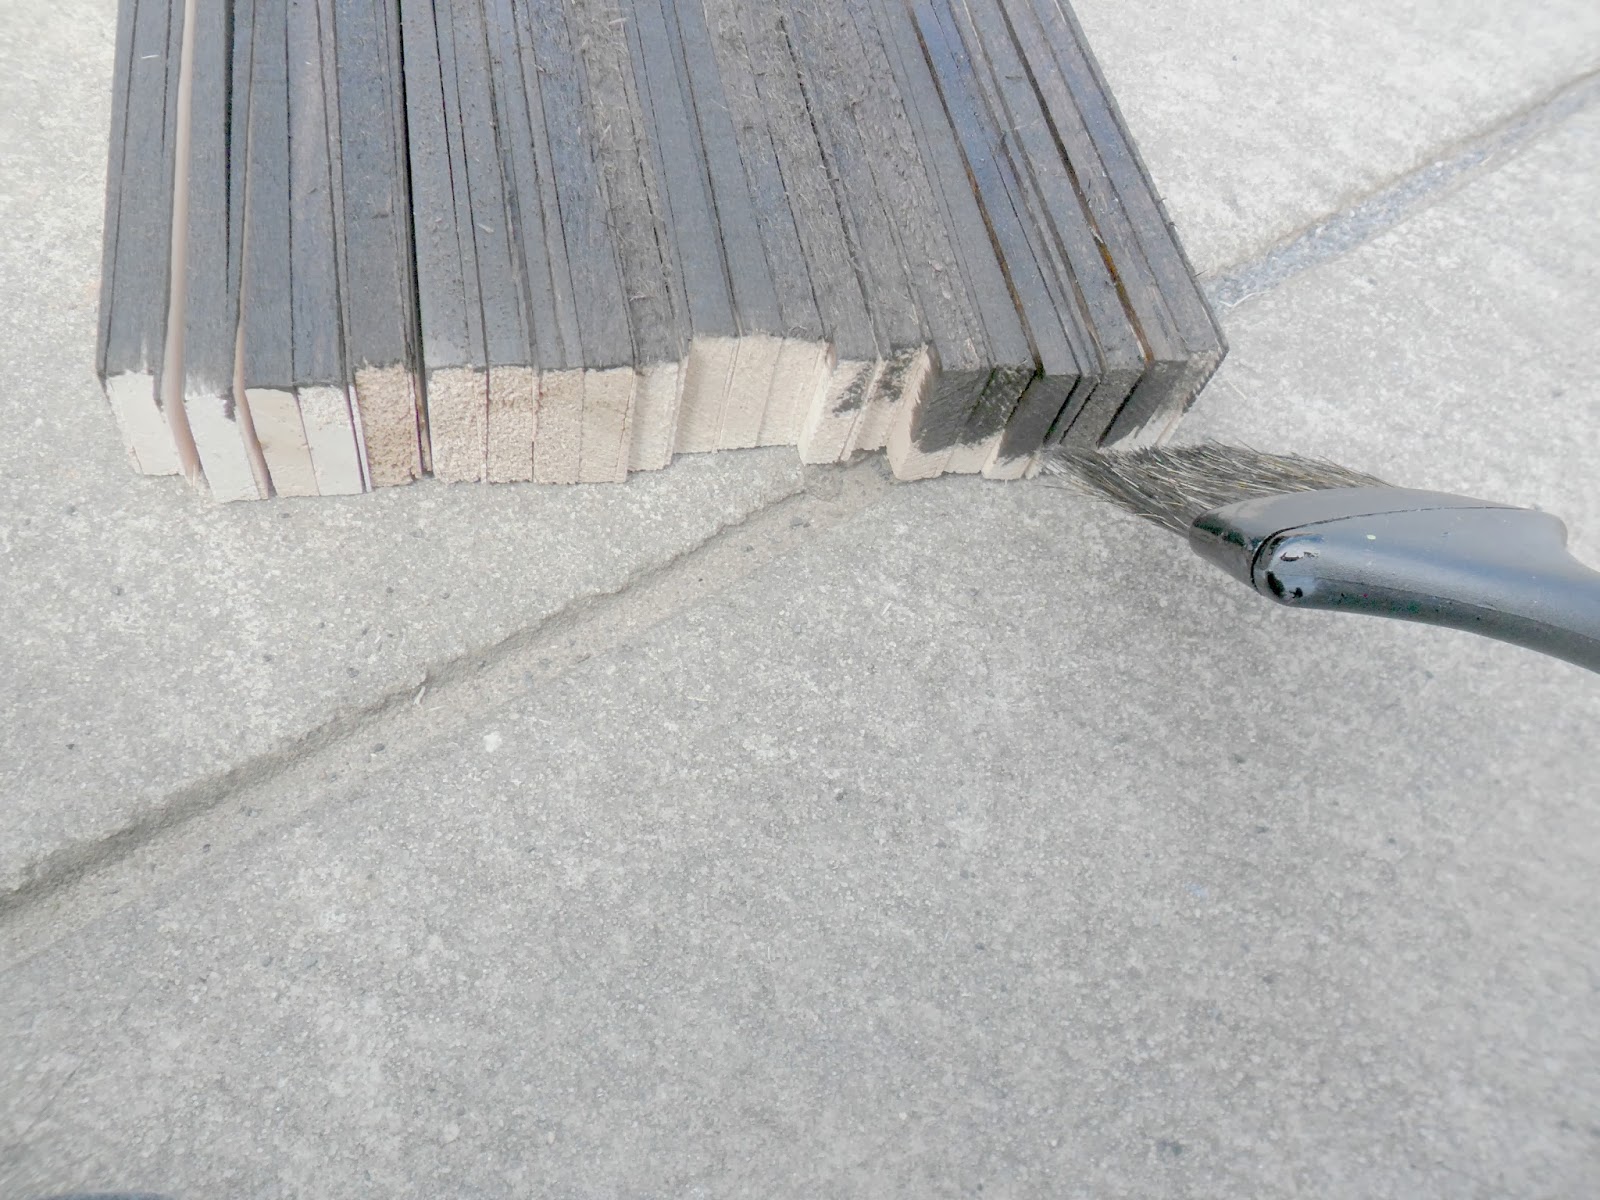
Open up your shims
you will notice how they are skinny on one end and fatter on the other end. You are going to want to line up two pieces with each other matching fat end with skinny end.


Get a regular staple gun and staple these together on one end. Staple on the side that is skinny. Usually one piece will be skinnier than the other. Staple on the fattest skinny piece. Does that make sense? Don't staple on the fat side. When we attach these to our crate, we will be using the nail gun staples and those will shoot right through the skinny pieces of this wood, basically punching a hole in it, so you need to use the regular staple gun to attach the two pieces together beforehand. Staple one way, and then come across and make an X with it....just to be sure these staples don't punch through the wood too (I've had it happen). No need to staple the other skinny side, since it will be sandwiched between the thick side and the wood when it is attached. If this doesn't make sense now, it should be clear while you are assembling it.

When they are all done, you are going to want to take them outside because we are going to get our stain on. Trust me when I say this, you really really really want to stain these before you put it all together. I know it's tempting to keep "building" because you kind of get in a groove with that, but you really don't want to try and stain this thing when it's all put together. Maybe painting it would be fine, but not staining.

one of the leftover ones from the other crates I made.

Sand it all first....or don't. I'm taking the term rustic to a whole new level here. I sanded the other crates and didn't do this one....not a whole lot of difference, so it's up to you.
Follow the directions on the can of stain. I'm totally using a turkey basting brush to paint the stain on. I have found that stain and turkey juices are of a similar consistency (ha!)....or this is just what I had on hand the first time I stained anything, so I designated it my staining brush....but I really do love using it for this.
Brush it on...

wait a little bit....and then wipe it off.

I lined up all of the pre-stapled shims on their sides

And then stained them all together as one.

Then flip them over and do the other side.
After both sides are done, lay them all out next to each other and stain the faces of the shims


Then after you wipe them off, flip them over and do the other side the same way.
All stained and now you can put it together!

Switch your regular nails out in your nail gun for these heavy duty staples. Mine came with a set of both.

Oh, and it's probably best to wear gloves when you stain something. I always forget to put them on, and then curse myself when I have ugly hands for a few days.
Stand up one of your rectangles on it's side and then dry fit your shims to see how you want them spaced. This is going to be the top, so you want to make sure they are evenly spaced from the top edge. Make sure you have stapled Xs showing face up, but on the bottom. The top part should have the fat side facing out and the skinny side up against the wood.
Once you have them all in place, go ahead and place one staple in each piece. Just one. After that, go back and make sure each piece is strait all the way down (you can still wiggle it with just one staple in it). Once each piece is perfectly strait, ad a second staple to secure it completely.

Repeat the same process for the other long side of the rectangle and then flip it over to the short side.

Fill in the short sides in the same way.

Once you have all of your pieces on, it's time to re-measure. You want to make sure the bottom piece is added at the depth you need based on your space requirements.

Mine needed to be 12.5 inches tall....which is exactly how tall it was to the top of the tallest piece....so I knew I needed to bring the bottom of my bottom rectangle all the way flush with the bottom of the shims.

See how the shims come all the way to meet the edge of my rectangle. Once you have it all lined up, just go around and staple each shim in place. Give them at least two staples in each shim. I always try to make it look uniform. You won't really see these very much since they are in the bottom of the crate, but you won't be covering them up all of the way, so try to be neat.


Almost there

it just needs a bottom

You can use whatever you want for the bottom. I found this scrap board in the garage. You want something with at least 1/2 to 3/4 inch thickness. You can cut a big piece to fit, or you can make slats. I like the two boards because there's a gap in the middle like slats, but it's not as much as a hassle.
I measured the space inside the bottom from shim to shim, width and length, and then cut these two pieces to fit.

I did a quick stain on them, and then wedged it inside the bottom of the crate.
I switched back to regular nails in the nail gun and nailed through the side of the crate and into the side of the bottom piece. Do this all the way around the perimeter of the piece. You need to be really careful here with your aim. It's really easy for the nail to come out the bottom or the top of the wood. If that happens, just break it off with needle nose pliers and add another nail to sure it up.

Repeat with the second piece.

Check the inside for any nails that didn't go in strait. I had none....yesss!

And it's finished!!!!


Actually I still need to add a coat of poly to this, but it will need to cure at least over night before I can do that....but it won't look much different than this....so for the blog, it's done!
What do you think? Worth an hour of my time and five bucks right? I love it!
xoxo!
Have a great day!
Anna
Sharing at:
These are great! So impressed by the budge too. Thanks so much for linking up at The Makers! :)
ReplyDeleteso creative!!! I'd love it if you shared this on Worthwhile Wednesday @ http://thecraftiestallie.blogspot.com/2014/03/worthwhile-wednesdays-7.html
ReplyDelete~Allie
thanks! I will do that!
DeleteAMAZING! What a genius idea! I never would have thought to use shims :) Thanks so much for linking up at Thursday STYLE!
ReplyDeleteThanks so much!
ReplyDeleteLove these! Bookmarking!
ReplyDeleteFound your blog via My Love 2 Create.
Val @ artsybuildinglady.blogspot.ca
thank you! That's awesome!
DeleteI really like this idea! Not sure where or when, but I am going to do this! :D Thank you so much for sharing. :)
ReplyDeleteAwesome! I hope you send me a link to a picture!
DeleteOK What an awesome tutorial!! I'm totally making some of these! Thanks for sharing on DIY Sunday Showcase!! I'm pinning this one to our talent board!!
ReplyDeleteShelly
minettesmaze.blogspot.com
Thanks! I'd love to see what you do, if you make one!
Delete