
Hope everyone had a lovely MLK day. We really enjoyed ourselves. My hubby had the day off and so did the kids, so we went to the park with some friends of ours and stayed for HOURS....and it was wonderful. The weather was perfect and the kids were perfectly content and we sat and had good conversation in the windy sunshine....and we even continued our get-together at our friend's home with take out Chinese food for dinner. The kids had a great day, and so did we.
On Sunday, while we were getting ready for church, I (once again) got really frustrated with the hair bow organization we had going on. We have two little girls and a mountain of hair bows. I had them forever in this large, shallow basket, but I decided to repurpose it, so the bows went into one of our little galvanized tin buckets that sit on my entryway shelves.

It was far from ideal, and the bows have started to lose shape because they shouldn't be all squished in a basket. They needed to hang somehow. When we got home from church, I got the fire under my seat to make something to solve this problem somehow. I went on a hunt to make something out of what I already had in my house. Here's what I came up with.

I had some old drawer fronts that came out of a demo-ed kitchen in the garage. I got them (with a bunch of different cabinet doors, etc) from the habitat re-store a year or two ago. I was going to use them as name plates for my kids in the mudroom cubbies. They were only a dollar each, so I grabbed them, but they ended up not working, so I didn't use them. It was perfect for this project though! I grabbed some ribbon and some scrap book paper I already had and modge podge.

The first thing I did was give the cabinet door two fresh coats of paint

Then I cut the scrap book paper to size and gave the wood in the center a coat of modge podge. I didn't bother filling the hole in the center, since the modge podge would make the paper stiff enough to not have an issue sinking into it or anything.....It's a pretty small hole.

Then I just laid the paper in place.

Next I added a coat of modge podge on top of my scrap book paper as well.

I added the letters I punched out. The scrapbook paper came with a bunch of pre-cut letters, so I just used what I had! And then I gave those a coat of modge podge as well.

I originally just had the blue and the green ribbon, but I decided to go ahead and use the coral and the gold ribbon I had laying around too. I decided it needed a little "more."

I started in the very middle, adding the green ribbon. I made sure to take it all of the way up the back of the board instead of just attaching it at the bottom....or else I'm sure it wouldn't last very long in this house.

Did you guys see what I did wrong in that picture above?
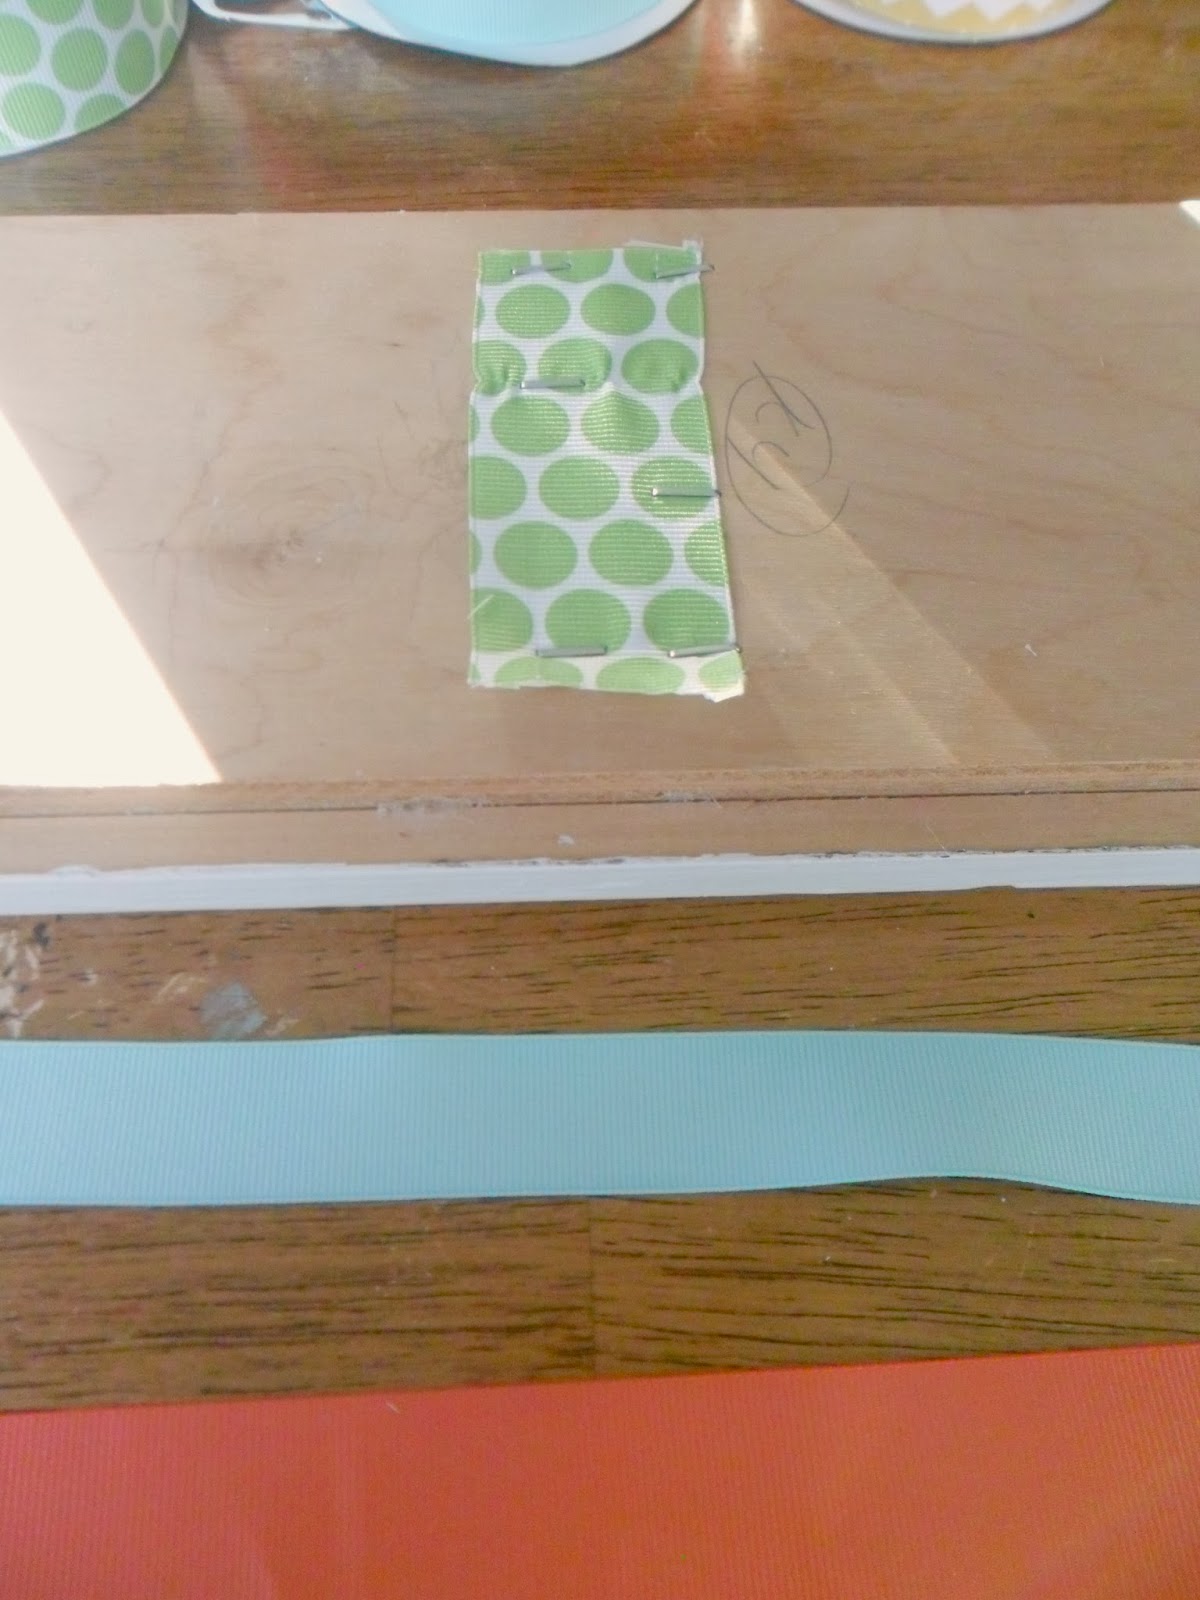
Yeah, I totally put it on backwards. The other side is white, so the pattern needed to show on the front of the project, not the back....I'm a dummy...I just cut it off (because nobody wants to fool with all of those staples) and cut a new piece of green ribbon and stapled that bad boy right over top of the one that was already on there.

I made sure to put plenty of staples in it to secure it on there, just in case little hands decide they want to pull on them.

Then I added the ribbons to the far left and far right sides. The coral ribbon is double sided so, I didn't have to worry about that one going on backwards...in case you were wondering.

Then I added the skinny blue ribbons in the middle of those.

Flipped it over and voila! A bow holder....well not quite, it still needed a little more work.

I folded the ends in half and snipped a diagonal line from the outside corner to the inside center of the ribbon (Ok....I know everybody knows how to do this...) to create a V


And then I added fray chek to the ends of all of the ribbons so they wouldn't fray. (ugh, please ignore that my table in in desperate need to be re-finished....will be doing that pretty soon, I think!)

Next I found some picture hanging brackets I had. Lucky me, there were only two left, and one was even used that I had pried off of something that had pink paint on it, but it worked....score!

I nailed those into the back of the wood. Being careful not to nail into the thinner part of the curve that is on the front. The nails I used were very small, but just to be sure it wouldn't come through the front, I attached them as close to the top as I could.

Then I repeated the same thing on the other side of the wood, making sure they were equidistant from the top edge. (haha, see how the one on the right is pink)

All done!
Here's my little monkey holding it up for you to see!

I hung it on the back of the door in my spare bedroom (because I don't quite trust my little girls to have it in their room just yet, plus I keep their dresser in the spare room too)


After adding a few bows.....that's like half of them too....good thing I have more room!

I was so pleased with how this turned out....and all with stuff I just had lying around the house. It made me happy to create something that I would have totally bought at the store! And all with things I already owned and had no use for. Oh, and if I may boast for a moment....I did all of this in my church clothes, lol! I was completely decked out with heels and all. I guess I got so wrapped up in my ideas, I forgot to change first. Good news is, I didn't get any paint on my good clothes :)
Hope y'all have a great day!
xoxo
Anna
Linking up to:
tatertots and jello
What a great idea! We have a hair bow issue in our house, too! I have 3-year-old twin girls who LOVE their bows. Thanks for sharing!
ReplyDelete- Tasha @ Designer Trapped in a Lawyer's Body {www.designertrapped.com{
Thank you Tasha! Twins! how fun :) I'll bet they are adorable. Good luck with your hair bow issues. Thanks for reading my blog :)
DeleteThank you so much! What a sweet comment :) I would love to see what you come up with! Good luck! Have a great Sunday!
ReplyDeleteThis is such a cute idea. I wish you had a pin it button so I could pin this to pinterest:( I going to make one of these. Have a great week.
ReplyDeleteShemi
ok...so I'm totally going to research how to add that today! I have wanted one, but didn't know how to add it. I'm on it! thanks for the comment!
DeleteSuper Cute! Thank you for sharing with the Clever Chicks Blog hop, I’ll be featuring you, so please feel free to grab my Featured Button! Have a great week!
ReplyDeleteKathy Shea Mormino
The Chicken Chick
http://www.The-Chicken-Chick.com
Yay! thank you so much! That is awesome!
Deletehi anna,
ReplyDeleteI'm here to let you know that you are on my top 3 favorites on The DIY'ers party last week♥ This project is featured on my pinterest, The DIY'ers Party Favorites Board!
Stop by and share your latest work of love again with us! Thanks for sharing, huggies♥
rea
Thank you so much! That's awesome. you made my day!
ReplyDeleteLooks great! I love the colors, and how you color coded the bows with it. Great project! Kari
ReplyDeleteThank you! It's not so color coded anymore...ha! Actually, it's so full of bows you can't even see the ribbons anymore....but this has worked out really well for us. My girls love looking at all of the bows and picking one out to match their outfit. Thanks for stopping by!
Delete